
A number of configurable settings can be adjusted by Site Administrators to customize a site or set up categories that can be used in a variety of functions by Users.
Settings should be changed with caution as they may have impacts across an entire site.
To configure your SPP site, navigate to the ‘Settings’ area of the Dashboard. Available settings include:
Site
Use the Site section to manage your site’s basic information and the categories used across your projects. These settings can influence how your site displays content and how your tools behave.
Basics
- Site Name: Sets the name displayed in your browser tab and used by search engines.
- Logo: Upload your site's primary logo.
⚠️ NOTE This setting does not update your site branding automatically. File a ticket with our Support Team if you need to update your logo. - Favicon: Upload a small browser icon (must be 16px × 16px).
⚠️ NOTE Favicons are not updated through this panel. File a ticket with our Support Team if you need to update your favicon.
Social Sharing
- Site Description: Set a short description for your site. Aim for no more than two sentences about 200 characters in total.
- Site Image: Upload an image that appears when your site is shared on social media platforms.
Contact Details
Add the contact details you want to use across your site. These may be used by tools such as the Contact Us tool.
- Contact name
- Phone
- Website
- Address (“In Writing”)
Social Links
Add links to your organization’s social media accounts:- Select Add Link
- Choose the service (i.e. Facebook, X, Instagram, YouTube)
- Add your URL
- Select Add
Your social links will automatically appear in the footer of your site.
Geographic Region
Set the region your site belongs to. This improves accuracy in tools such as the Social Map.
Project Groups
Project Groups help you connect related projects under a shared program or initiative. This makes reporting and navigation easier for your team and your community.
Site Administrators and Team Leads can create and edit Project Groups.
How to Create a Project Group:
- Open Settings in the Dashboard
- Select Project Groups
- Choose Add Project Group
- Enter the name and select Add
To update a Group name, select Edit next to it.
Project Interests
Project Interests help organize your projects and make it easier for community members to find topics that matter to them. Members can also add interests to their profile and choose to receive notifications when projects match those interests.
There are two types of interests:
- Project Categories – broad themes such as Environment, Transport, Arts and Culture, or Recreation
- Project Locations – geographic areas such as suburbs, neighbourhoods, or regions
Site Administrators and Team Leads can manage Categories and Locations.
How to Add a Category or Location:
- Open Settings in the Dashboard
- Select Project Interests
- Choose Add Category or Add Location
- Enter the name and select Add
To edit an existing interest, select Edit next to its name.
⚠️ NOTE If you need to delete an existing category or location, please file a ticket with our Support Team.
Moderation
Moderation settings help you control how feedback is reviewed, who is notified, which words are blocked, and which regions can submit feedback on your site. These settings apply site-wide across all tools, pages, and feedback forms.
Moderation Method
Choose how feedback is reviewed before it becomes visible on your site.
Post-moderation
- Feedback is published immediately. Moderators review and remove posts only if there is an issue.
Pre-moderation
- Feedback does not appear on the site until a moderator has reviewed and approved it.
- Use this option if you need tighter control over contributions, sensitive topics, or high-risk projects.
Moderation Notifications
Set who receives email alerts when feedback is flagged or referred by moderators.
- Notifications apply site-wide
- You can add one or multiple email addresses
- Separate each email with a comma
Banned Words
The banned words list is used to block any public Contributions made by visitors or Members that contain nominated words from being published on a Site. Contributions containing these words will not be able to be submitted at the visitors end and will not enter into the Moderation Workflow.
To Modify the banned words list:
- Go to the Dashboard > Settings > Banned Words
- On the top-right of the page, click "Add Word"
- Enter the word and then Save.
You can edit and delete the word from this section as well.
💡NOTE: Keep your banned word list short and focused. Over-blocking may prevent legitimate feedback from being submitted.
Allow you to control which countries can register and submit feedback on your site. This helps reduce spam, improve data quality, and ensure contributions come from your intended audience.
🆕Region Restrictions
Allows you to control which countries can register and submit feedback on your site. This helps reduce spam, improve data quality, and ensure contributions come from your intended audience.
Allowed vs Blocked Countries
The country selection panel shows two lists:
- Allowed Countries – users in these countries can register and submit feedback.
- Blocked Countries – users in these countries can view forms but cannot submit them.
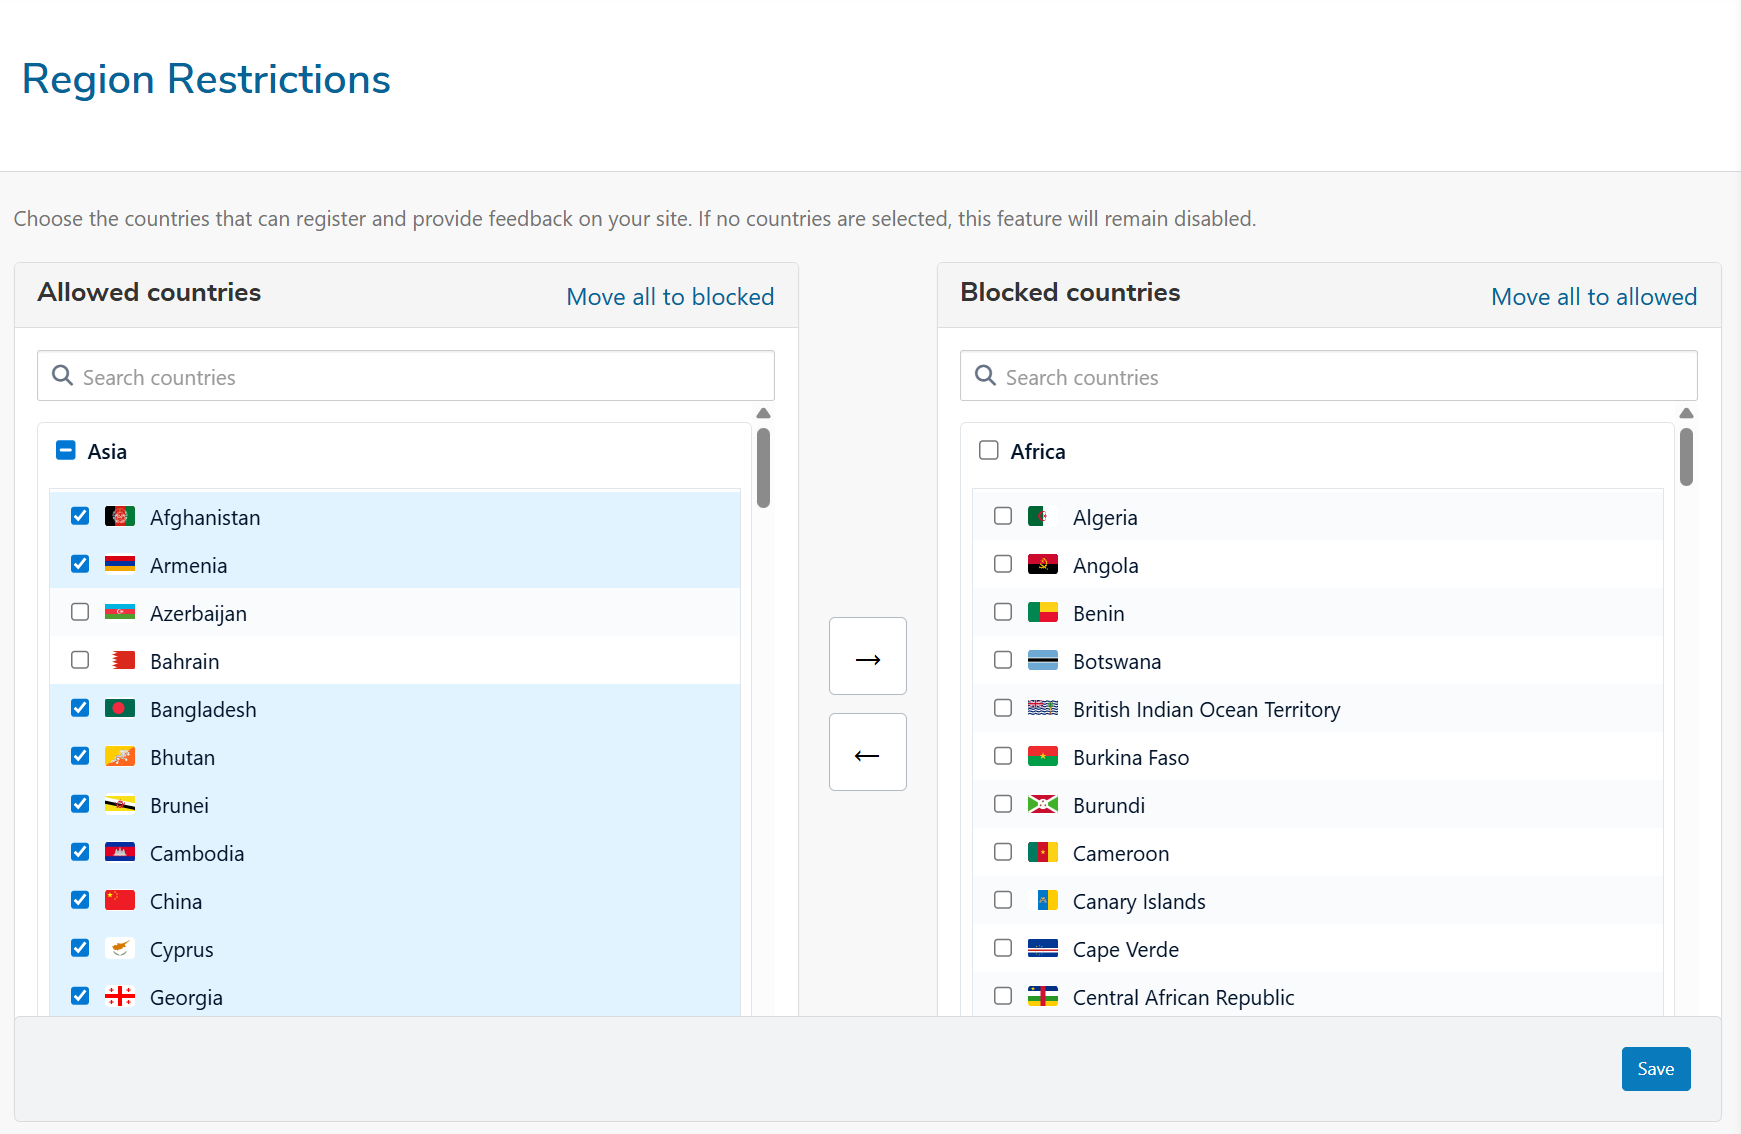
You can:
- Select individual countries
- Select full regions at once
- Move countries between Allowed and Blocked using arrow controls
- Use Move All to update an entire list quickly
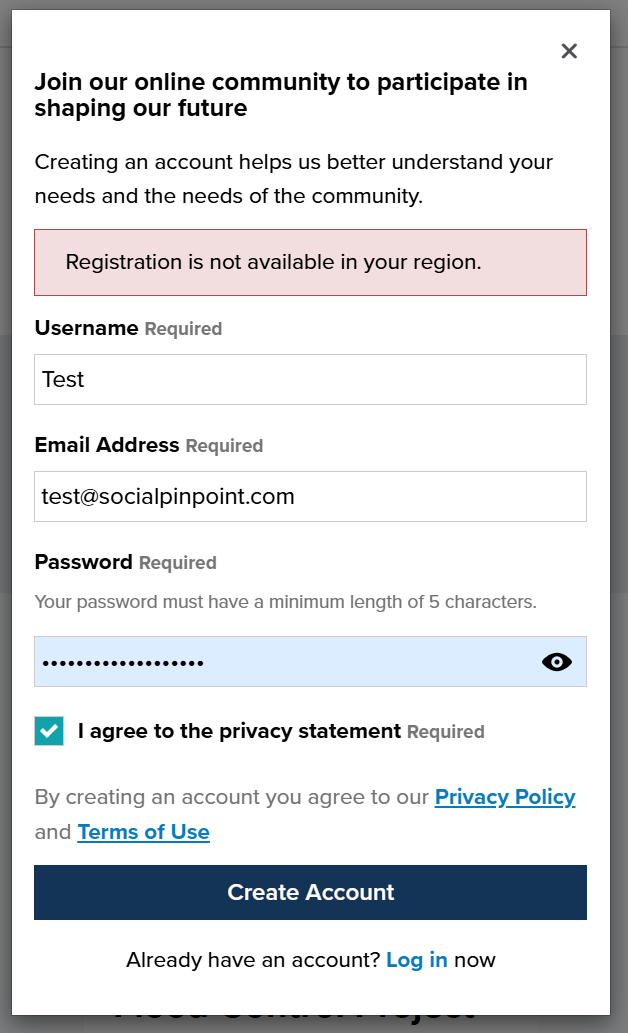
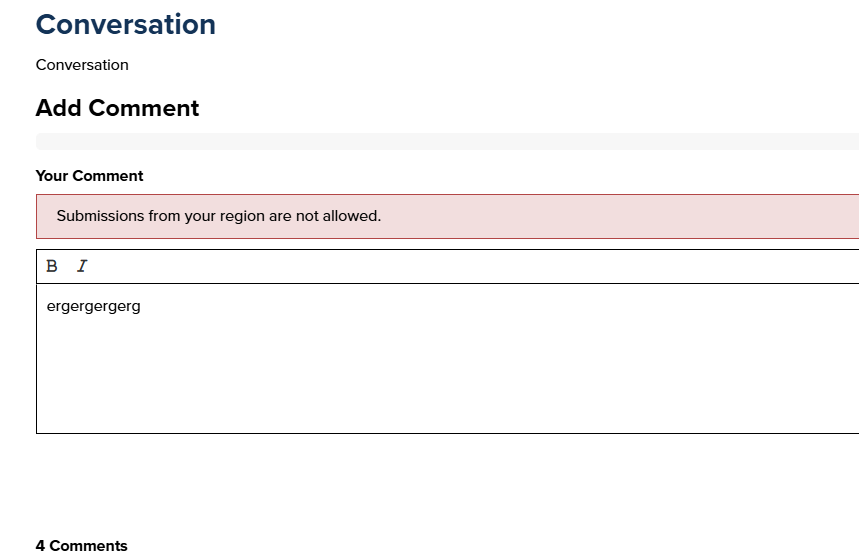
Restricted regions are shown the following error messages
- Registration - “Registration is not available in your region.”
- Feedback submission - “Submissions from your region are not allowed.”
Projects:
- Password Protection: Restrict access to anyone that has the generic password for the project. People accessing the project page do not have to be registered members of your site.
- Preview Link IP Allow List: Restrict an IP Address here.
🎯Key Actions
Setup Privacy Consent
Settings allow you to control how privacy information is displayed to users when they submit feedback. These settings apply across all participation tools unless you choose to override them at the tool level.
Enable Privacy Consent
Turn on Privacy Consent for your site.
-
When enabled, a privacy consent checkbox appears on all participation tools
-
Users must tick the checkbox before submitting their response
-
If not enabled, tools will not include a privacy consent field unless individually configured
Display Privacy Consent
Choose whether to show the privacy consent checkbox across all tools.
Options
-
Yes – The checkbox appears on every participation tool
-
No – The checkbox is not shown unless manually enabled within a tool
Allow Tool-Level Overrides
Let project authors and tool editors control how privacy consent is displayed for each participation tool.
Options
-
Yes – Authors can override the site-wide privacy consent settings
-
No – Site settings apply everywhere with no exceptions
Use this if some tools require a stricter or more flexible privacy prompt.
Privacy Consent Label
This is the text that appears next to the privacy consent checkbox.
You can include a link to your privacy statement by placing curly brackets { } around the part of the sentence that should open the privacy modal.
Example:
I agree to the {privacy statement}
Privacy Consent Description
Optional supporting text that appears below the consent checkbox.
Use this field to:
-
Provide additional context
-
Explain how user information will be used
-
Link to further policies (if required)
This helps build trust and transparency for your participants.
Privacy Error Message
This message appears when a user tries to submit feedback without ticking the privacy consent checkbox.
You can update this to match your organisation’s tone or compliance requirements.
Setup third-party analytics
In addition to the web analytics capabilities included in Social Pinpoint, additional third-party web analytics packages can be added such as Google Analytics.
This can be achieved by following the Tracking Codes links from the Settings area of the Dashboard and adding the embeddable tracking code from the third-party service.
To add a third-party analytics service:
- Navigate to the Tracking Codes page in the Settings area in the Dashboard Panel.
- Copy the tracking code from the third-party service into the Track Codes field.
- Set a preference for whether the code should be inserted into the ‘header’ or ‘footer’ of every page.
- Select Save.
If setting up Google Analytics, Users must enter the Google Analytics ID instead of entering information into the track code field.
Set up contribution notifications
Site-wide email notifications can be sent to nominated email address whenever a visitor or Member makes a contribution. The email will contain the content of the contribution.
This can be useful for notifying specific people of site activity or for records keeping purposes.
To nominate specific email addresses to receive contribution notifications:
- Navigate to the Notifications page from the Settings area in the Dashboard Panel.
- Enable the feature by ticking the Sends a notification alert to the client when feedback has been received box.
- Insert the nominated email addresses into the Add email addresses field. Multiple email addresses can be added by using a comma in between addresses.
- Select Save.
Add a URL or redirect
Once you have set the URL of a page, you may have situations where you want users to be able to access the same page via another URL or redirect.
When you add an additional URL, visitors to your site will be able to access the target page from both the original URL that you created when setting up the project as well as the new URL you are adding in the project settings
To add a URL to a page:
- Navigate to the target page and click the Settings button from the Toolbar.
- In the page settings menu select Location.
- Select Add URL, then input the additional URL into the Path field.
- Confirm the change by clicking the 'Save Changes' button.
💡 User Tip
The Page settings will allow you to set up redirects to pages hosted on your engagement site. If you are wanting to set up a redirect using an external domain (for example your corporate website) please reach out to support.